How Hard Could It Be, Part 5.
(See past parts 1, 2, 3, and 4.)After some initial trouble grasping a fundamental of image processing (specifically, that pixels taken in groups are much more useful than pixels taken individually), our home-grown statistical approach has worked out fairly well. The algorithms we've applied so far have done a nice job of finding and separating the foreground and background components of our noisy image. Really, the implementation we have just about fits the bill. Unfortunately, it just looks a little too home-grown.
Here's where we left off:
Current approach
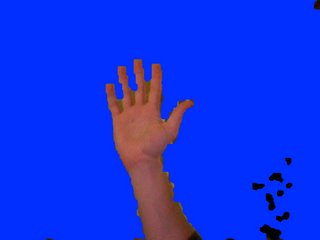
It'd be really nice if we could nail the transitions from background to foreground, so that the outline looks more natural. Right now it's pretty blocky and jagged. Certainly, it looks nothing like the Apple target:
Apple implementation
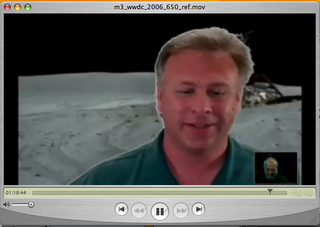
The white outline highlights the transition from foreground to background: that looks damned nice. Let's try to adapt our run-length approach, with a goal of creating a more natural outline.
As it turns out, the run-length implementation uses a similar technique to that described by common morphological operators*. These operators generally work by overlaying a black-and-white shape on each pixel of an image, and flipping the pixel to be either black or white depending on how the image overlaps with the overlaid shape. This actually sounds pretty similar to run-length detection, doesn't it? With run-length detection we applied a 15-pixel run (the shape) to individual pixels in our image, and flipped all of the pixels in the shape between foreground and background depending on how the shape overlapped.
This should become more clear in a minute. For the morphological operators we'll be using, erosion and dilation, a circle tends to work well as the overlay shape.
The shape (a nine-by-nine pixel grid)

This shape will be applied to each successive pixel (the "target pixel") in the image, with the shape centered over each target pixel. Similar to the run-length detection algorithm, at each target pixel we'll count how many neighboring pixels in the image are both inside the circle, and foreground or background. We'll use those counts to determine whether to change the target pixel at the center to foreground or background. Specifically:
Erosion
- For every foreground pixel in the image:
Place the circle over the target pixel, so the pixel is located at the center of the circle.
Count the number of foreground pixels inside the circle.
If every pixel inside the circle is foreground, keep the target pixel as foreground.
Otherwise, change the target pixel to background.
Dilation works similarly, but on background pixels:
Dilation
- For every background pixel in the image:
Place the circle over the target pixel, so the pixel is located at the center of the circle.
Count the number of background pixels inside the circle.
If every pixel inside the circle is background, keep the target pixel as background.
Otherwise, change the target pixel to foreground.
That said, the effects of erosion and dilation are much more easily explained visually, so thanks to Heriot-Watt University's CS department here are some images:
Erosion

Dilation

As you can see, erosion tends to shrink the foreground (the white area), while dilation tends to grow it.
So! With the basics of erosion and dilation under our belts, we're almost ready to get programmin'. Before we do, though, there's One More Thing: how does this help?
What we'd like to do is create a sharp but natural outline around our foreground. In order to do this using our morphological operators, we need to apply them in the right sequence.
We'll first apply an "Open" operator, which is no more than an erosion followed by a dilation. The effect of an Open is to remove extraneous pixels from the foreground, pixels that don't follow the overall shape:
"Opening" operator

After performing the Open, we'll apply a "Closing" operator: a dilation followed by an erosion. The net effect of a Close is to fill in background holes inside the foreground:
"Closing" operator

So we'll first apply an Open (erosion, dilation), then a Close (dilation, erosion). The combination of these operators, in this order, should reduce foreground leak into the background, and background leak into the foreground.
All right. So what's it look like?
Final result
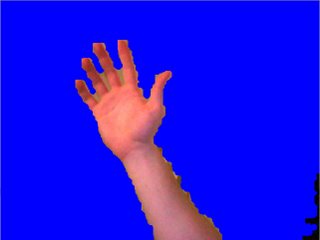
That worked. The artifacting and boxiness around the hand has been noticeably reduced. Here's a close-up of the fingers:
Close-up of final result
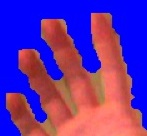
And by comparison, here's a close-up of the run-length detection alone:
Close-up of previous approach
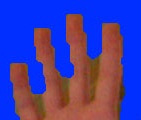
The hand is more clearly defined than it was under the run-length approach alone, and no new artifacts were introduced, so this is the point where I stopped. The final result was, in my eyes, close enough to the original solution that it seems only small tweaks and improvements would be necessary. The algorithms are generally sufficient. Next time I'll wrap things up by discussing the elephant in the room: performance.
* Big thanks to Jeff, incidentally, for originally pointing out morphological operators when my homegrown algorithms ran out of steam. This is what happens when you ask someone with background in the problem area.

0 Comments:
Post a Comment
<< Home